Terminology Check - What are Data Flows?

It's another terminology post! Earlier this week I was having a delightful lunch with Angela Henry, Kevin Feasel, Javier Guillen, and Jason Thomas. We were chatting about various new things. Partway thru our conversation Jason stops me because he thought I was talking about Power BI Dataflows when I was really talking about Azure Data Factory Data Flows. It was kind of a funny moment actually but it did illustrate that we have some overlapping terminology coming into our world.

So, with that inspiration, let's have a chat about some of the new data flow capabilities in the Microsoft world, shall we?

Azure Data Factory Data Flow

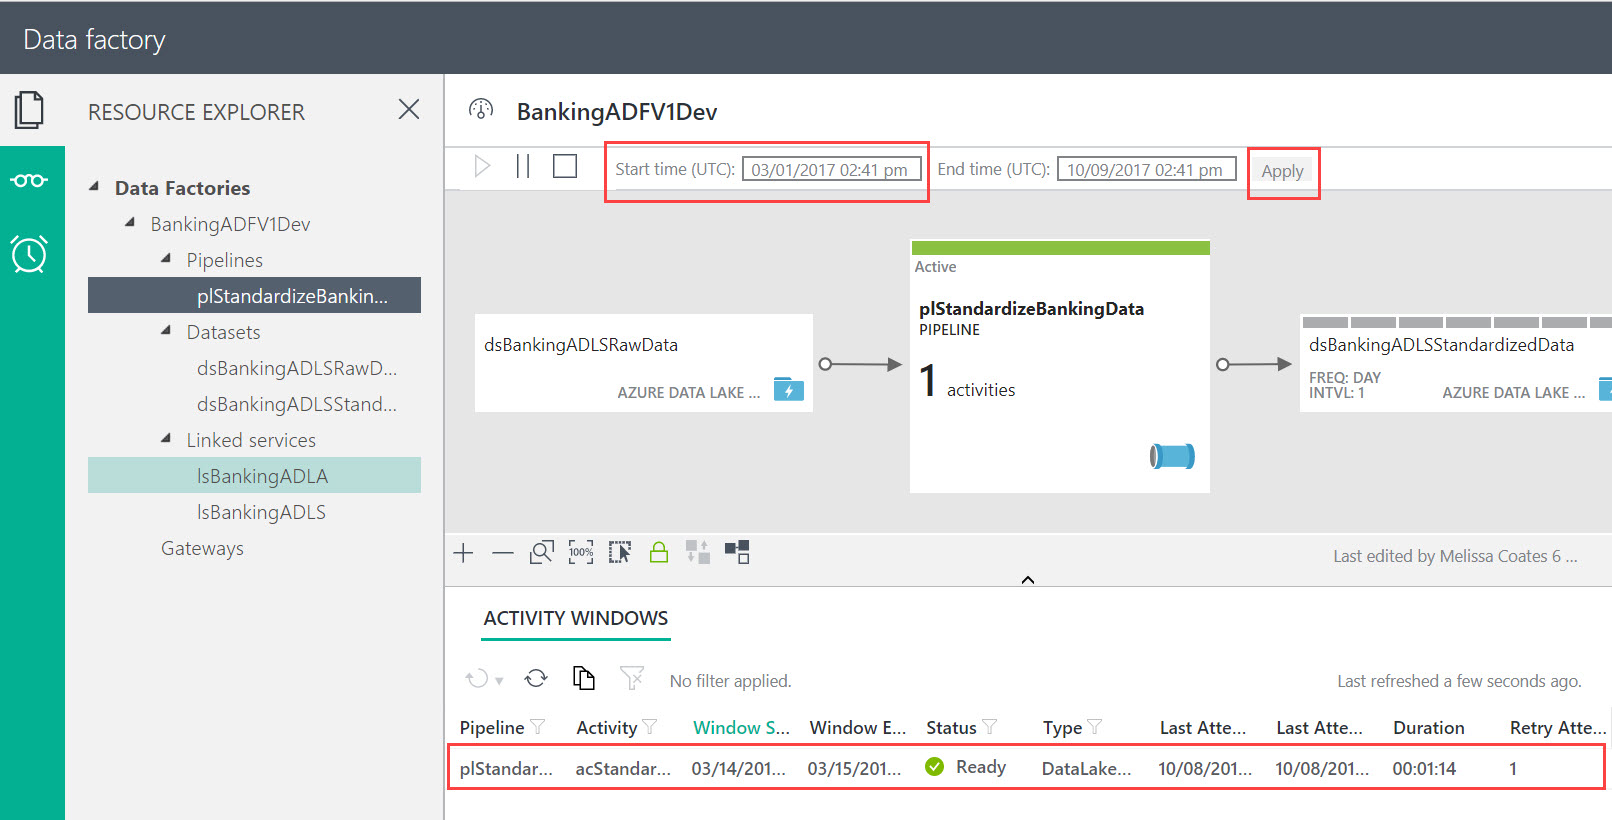
The new Azure Data Factory (ADF) Data Flow capability is analogous to those from SSIS: a data flow allows you to build data transformation logic using a graphical interface. A really interesting aspect about ADF Data Flows is that they use Azure Databricks as the runtime engine underneath -- however, you don't actually have to know Spark or Databricks in order to be able to use ADF Data Flows. The goal is for it to be a low code/no code way to transform data at scale.

Follow Mark Kromer and the ADF team on Twitter to stay up to date on the rollout of the preview.


More info on ADF Data Flow can be found here: https://aka.ms/adfdataflowdocs

Power BI Dataflows

Power BI Dataflows (yes, this one is branded as one word) are a new type of object in a Power BI Workspace which will allow you to load data into a Common Data Model. Data is loaded via a web-based version of Power Query, which is why this capability is referred to as self-service data prep. The resulting data is stored in Azure Data Lake Storage Gen 2. Once in the Common Data Model in the data lake, it can be reused among various Power BI datasets -- allowing the data load, transformations, and cleansing to be done once rather than by numerous PBIX files. This capability was known for a little while during the private preview as Power BI Datapools or as 'Common Data Service for Analytics' (CDS-A) -- but the final name looks like it's going to be Power BI Dataflows.

It's still early so there's not a lot of info available online yet. James Serra wrote up a nice summary and has a few links on his blog. Also, here's a diagram that Chris and I included in the recently updated whitepaper Planning a Power BI Enterprise Deployment which shows our initial understanding of the Power BI Dataflows capability:

Note that Pro users can use Power BI Dataflows without requiring Premium. However, my hunch is that this capabililty will be most appealing for data at scale - i.e., the features that Premium offers with respect to Power BI Dataflows will be pretty compelling, which is why Premium is depicted in the diagram above.

SSIS Data Flow

Data flows have long been a key part of SQL Server Integration Services (SSIS) for data transformations, just like the new capability being added to ADF discussed above. As of Azure Data Factory V2, we can also host and execute SSIS packages in Azure from ADF V2. 

Microsoft Flow

Just for completeness I'll cover one more product which is similarly named. Flow is an Office 365 service for workflow automation between services. It can be used in conjunction with PowerApps and Power BI for different types of workflow automation. Flow lets you do things like approval requests, sending an e-mail alert, or creating a task in a project management system.

Now you know there are multiple types data flows being launched into the world of Microsoft BI (in addition to the good old SSIS data flows we've had forever). Now you can cleverly watch out for which one is being bantered about in your techie conversations. 

You Might Also Like...

Three Ways to Use Power BI Dataflows

Terminology Check - What is a Power BI App?


Find Pipelines Currently Running in Azure Data Factory with PowerShell

This is a quick post to share a few scripts to find what is currently executing in Azure Data Factory. These PowerShell scripts are applicable to ADF version 1 (not version 2 which uses different cmdlets).

Prerequisite: In addition to having installed the Azure Resource Manager modules, you'll have to register the provider for  Azure Data Factory:

#One-time registration of the ADF provider
#Register-AzureRmResourceProvider -ProviderNamespace Microsoft.DataFactory

Check for Unfinished ADF Jobs 

This script finds unfinished jobs (i.e., not in a ready state), after the start date, sorted by status (i.e., window state):

#-----------------------------------------
#Input Area
$subscriptionName = 'YourSubscriptionName'
$resourceGroupName = 'YourResourceGroupName'
$dataFactoryName = 'YourDataFactoryName'
$runStartDateTimeUTC = '2018-01-20T14:00:00Z'
#-----------------------------------------
#Manual login into Azure
Login-AzureRmAccount -SubscriptionName $subscriptionName
#-----------------------------------------
Get-AzureRmDataFactoryActivityWindow `
     -DataFactoryName $dataFactoryName `
     -ResourceGroupName $resourceGroupName `
     -RunStart $runStartDateTimeUTC `
     | ? {$PSItem.WindowState -ne 'Ready'} `
     | SELECT PipelineName, ActivityName, ActivityType, WindowState, `
              PercentComplete, RunStart, RunEnd, Duration `
     | Sort-Object WindowState | Format-Table 
ADFJobs_Unfinished.jpg

For brevity, the rest of this post skips repeating the input area and login as shown in the first script above.

Check Status of All ADF Jobs

This script shows status of all jobs after the start date, sorted by pipeline name:

Get-AzureRmDataFactoryActivityWindow `
     -DataFactoryName $dataFactoryName `
     -ResourceGroupName $resourceGroupName `
     -RunStart $runStartDateTimeUTC `
     | SELECT PipelineName, ActivityName, ActivityType, `
              WindowState, PercentComplete `
     | Sort-Object PipelineName | Format-Table 
ADFJobs_All.jpg

Find Status of Certain ADF Jobs Based on a Naming Convention

If you have implemented a nice consistent naming convention (yes, I'm totally a naming convention junkie), you can search based on the name of an activity or pipeline. This example is looking for the status of the jobs which copy data from Oracle into Azure Data Lake Store:

Get-AzureRmDataFactoryActivityWindow `
     -DataFactoryName $dataFactoryName `
     -ResourceGroupName $resourceGroupName `
     -RunStart $runStartDateTimeUTC `
     | ? {$PSItem.ActivityName -like 'ORA*' `
          -Or $PSItem.ActivityName -like 'DW*'} `
     | SELECT PipelineName, ActivityName, ActivityType, WindowState, `
              PercentComplete, RunStart, RunEnd, Duration `
     | Sort-Object PipelineName | Format-Table 
ADFJobs_All_OracleActivities.jpg

Running U-SQL on a Schedule with Azure Data Factory to Populate Azure Data Lake

This post is a continuation of the blog where I discussed using U-SQL to standardize JSON input files which vary in format from file to file, into a consistent standardized CSV format that's easier to work with downstream. Now let's talk about how to make this happen on a schedule with Azure Data Factory (ADF).

This was all done with Version 1 of ADF. I have not tested this yet with the ADF V2 Preview which was just released.

Prerequisites

  1. Steps 1-4 from my previous post, which includes registering the custom JSON assemblies, creating a database in the Azure Data Lake Catalog, and uploading our raw file so it's ready to use.
  2. An Azure Data Factory service provisioned and ready to use (this post reflects ADF V1), along with some basic knowledge about ADF since I'm not going into ADF details in this post.

Summary of Steps

  1. Create a procedure in the ADL catalog
  2. Test the procedure
  3. Create a service principal (aka AAD App)  [one time setup]
  4. Assign permissions to service principal  [one time setup]
  5. Obtain IDs [one time setup]
  6. Create ADF components
  7. Verify success of ADF job

Step 1: Create a Procedure in the ADLA Catalog Which Will Be Executed By ADF

This ADLA procedure will be executed by Azure Data Factory. Alternatively, you could also reference a U-SQL script in Azure Storage if you prefer storing a script file there (at the time of this writing, we cannot yet store a script file in ADLS). Either way, U-SQL scripts are typically just too long to practically embed in the Azure Data Factory pipeline activity. In addition to what was discussed in the first part of this solution, we want this stored procedure to:

  • Reference 'external' variables which will be populated by the ADF time slices (in our case, the time slice is daily)
  • Apply the ADF time slices to the 'where' predicate
  • Use variables to create a "smart" output file path & name which allows the standardized output partitioning to match the raw data partitioning by year/month/day

Run the following U-SQL (Azure Data Lake Analytics) job:

CREATE PROCEDURE BankingADLDB.dbo.uspCreateStandardizedDataset(@DateSliceStart DateTime, @DateSliceEnd DateTime)
AS
BEGIN

REFERENCE ASSEMBLY BankingADLDB.[Newtonsoft.Json];
REFERENCE ASSEMBLY BankingADLDB.[Microsoft.Analytics.Samples.Formats]; 

USING Microsoft.Analytics.Samples.Formats.Json;

//These external parameters will be populated by ADF based on the time slice being executed.
DECLARE EXTERNAL @DateSliceStart DateTime =System.DateTime.Parse("2017/03/14");
DECLARE EXTERNAL @DateSliceEnd DateTime =System.DateTime.Parse("2017/03/14");

//These are intermediary variables which inherit the time element from the ADF time slice.
DECLARE @YearNbr int = @DateSliceStart.Year;
DECLARE @MonthNbr int = @DateSliceStart.Month;
DECLARE @DayNbr int = @DateSliceStart.Day;

//These are used to align the Year/Month/Day partitioning of the input & output.
//This technique also allows U-SQL to dynamically generate different output file path & name.
DECLARE @YearString string = @YearNbr.ToString();
DECLARE @MonthString string = @MonthNbr.ToString().PadLeft(2, '0');
DECLARE @DayString string = @DayNbr.ToString().PadLeft(2, '0');

DECLARE @InputPath = "/ATMMachineData/RawData/" + @YearString + "/" + @MonthString + "/{filename}.json";

DECLARE @OutputFile string = "/ATMMachineData/StandardizedData/" + @YearString + "/" + @MonthString + "/" + @YearString + @MonthString + @DayString + ".csv";

@RawData = 
EXTRACT 
 [AID] string
,[Timestamp] DateTime
,[Data] string
,date DateTime//virtual column
,filename string//virtual column 
FROM @InputPath
USING new JsonExtractor();

@CreateJSONTuple = 
SELECT 
 [AID] AS AssignedID
,[Timestamp] AS TimestampUtc
,JsonFunctions.JsonTuple([Data]) AS EventData 
FROM @RawData
WHERE [Timestamp] >= @DateSliceStart
AND [Timestamp] <@DateSliceEnd;

@Dataset =
SELECT
AssignedID
,TimestampUtc
,EventData["Val"] ?? "0" AS DataValue
,EventData["PrevVal"] ?? "0" AS PreviousDataValue
,EventData["Descr"] ?? "N/A" AS Description
FROM @CreateJSONTuple;

OUTPUT @Dataset
TO @OutputFile
USING Outputters.Csv(outputHeader:true,quoting:false);

END;


Step 2: Test the ADLA Procedure Works

Before we invoke it with ADF, let's double check our new procedure is working ok. Run the following U-SQL job in ADLA to call the procedure & use 3/14/2017 as the variable values (which matches the timestamp of our original source file):

BankingADLDB.dbo.uspCreateStandardizedDataset(System.DateTime.Parse("2017/03/14"), System.DateTime.Parse("2017/03/15"));

Verify the output is created via Data Explorer. Note the procedure will create the folder structure as well as the file based on the @OutputFile parameter value. After you have confirmed that it worked, go ahead & delete the output file ATMMachineData\StandardizedData\2017\03\20170314.csv so we can be certain later when it's been generated with ADF.

ADLProcOutput.jpg

Step 3: Create a Service Principal For Use by ADF When it Executes U-SQL

You can authenticate using your own credentials in ADF, but they'll expire pretty quick -- so although that technique is fast and easy for testing, personal credentials won't work for ongoing scheduling. Therefore, we'll set this up using a service principal so you get started on the right foot. This is easiest in PowerShell (though you can also do this in the Azure portal if you prefer, in the Azure Active Directory menu > App Registrations page).

#Input Area
$subscriptionName = '<YourSubscriptionNameHere>'
$aadSvcPrinAppDisplayName = 'ADF ReadWrite Access To ADL - Svc Prin - Dev'
$aadSvcPrinAppHomePage = 'http://ADFReadWriteAccessToADLDev'
$aadSvcPrinAppIdentifierUri = 'https://url.com/ADFReadWriteAccessToADLDev'
$aadSvcPrinAppPassword = '<YourComplicatedPWForAppRegistration>' 

#-----------------------------------------

#Manual login into Azure
Login-AzureRmAccount -SubscriptionName $subscriptionName

#-----------------------------------------

#Create Service Principal (App Registration):
$aadSvcPrinApplicationDev = New-AzureRmADApplication `
 -DisplayName $aadSvcPrinAppDisplayName `
 -HomePage $aadSvcPrinAppHomePage `
 -IdentifierUris $aadSvcPrinAppIdentifierUri `
 -Password $aadSvcPrinAppPassword

New-AzureRmADServicePrincipal -ApplicationId $aadSvcPrinApplicationDev.ApplicationId

In AAD, it should look like this:

AADAppRegistration.jpg

I put "Dev" in the suffix of mine because I typically create separate service principals for each environment (Dev, Test, Prod). It's also frequently a good idea to create separate registrations for Read/Write vs. just Read permissions.

Step 4: Assign Permissions to the Service Principal So It Can Read and Write Via the ADF Job

For this step we'll use the portal instead of PowerShell. You can do this piece in PowerShell as well if you prefer using the Set-AzureRmDataLakeStoreItemAclEntry cmdlet - you'll also need to make sure the Azure Data Lake provider is registered. To keep this fast & easy, let's just use the portal.

Security for Azure Data Lake Store

The first piece is referred to as ACLs - access control lists. Go to Data Explorer in ADLS. Make sure you're on the root folder and select Access (or if you want to define permissions at a sub-foldere level only, it's ok to start from that level). Choose Add.

ADLSecurity1.jpg

Select User or Group: choose the ADF service principal we just created. 

Select Permissions: This account needs to read, write, and execute. Note the radio button selections as well so that existing and new child objects will be assigned this permission.

ADLSecurity2.jpg
 

As soon as you hit ok, notice the message at the top of the page. Make sure not to close the blade while it's assigning the permissions to the child objects:

ADLSecurity3.jpg
 

When you see that it's finished (with the green check mark), then it's ok to close the blade:

ADLSecurity4.jpg
 

Security for Azure Data Lake Analytics

The second piece of security needed for our service principal is done over in Azure Data Lake Analytics, so that it's allowed to run U-SQL:

ADLSecurity5.jpg

Note that the equivalent IAM (Identity & Access Mgmt) permissions for our service principal don't need to be assigned over in ADLS - just ADLA. Normally that step would be needed for a regular user though. There's actually a *lot* more to know about security with Azure Data Lake that I'm not going into here. 

Step 5: Obtain IDs Needed for Azure Data Factory

AAD Application ID

Go find the Application ID for your new service principal and copy it so you have it:

AADApplicationID.jpg
 

Tenant ID (aka Directory ID)

Also find your Tenant ID that's associated with Azure Active Directory:

TenantID.jpg
 

Subscription ID

And, lastly, find the Subscription ID where you've provisioned ADL and ADF:

SubscriptionID.jpg
 

Step 6: Create Azure Data Factory Components

The following ADF scripts include two linked services, two datasets, and one pipeline. 

In both linked services you will need to replace several things (as well as the account name and resource group name). Also, be sure NOT to hit the authorize button if you're creating the linked services directly in the portal interface (it's actually a much better idea to use Visual Studio because all of these files can be source-controlled and you can use configuration files to direct deployments to Dev, Test, and Prod which have different values for IDs, keys, etc). You may also want to change the linked services names - mine is called lsBankingADLA (or S) to coincide with what my actual services are called -- but without the Dev, Test, Prod suffix that they have for real (because we need to propagate the linked services without changing the names).

Linked Service for Azure Data Lake Analytics

{
"name": "lsBankingADLA",
"properties": {
"type": "AzureDataLakeAnalytics",
"typeProperties": {
"accountName": "<YourADLAName>",
"dataLakeAnalyticsUri": "azuredatalakeanalytics.net",
"servicePrincipalId": "<YourApplicationIDForTheServicePrincipal>",
"servicePrincipalKey": "<YourComplicatedPWForAppRegistration>",
"tenant": "<YourAADDirectoryID>",
"subscriptionId": "<YourSubscriptionID>",
"resourceGroupName": "<YourResourceGroupWhereADLAResides>"
}
}
}
 

Linked Service for Azure Data Lake Store

{
"name": "lsBankingADLS",
"properties": {
"type": "AzureDataLakeStore",
"typeProperties": {
"dataLakeStoreUri": "adl://<YourADLSName>.azuredatalakestore.net/",
"servicePrincipalId": "<YourApplicationIDForTheServicePrincipal>",
"servicePrincipalKey": "<YourComplicatedPWForAppRegistration>",
"tenant": "<YourAADDirectoryID>",
"subscriptionId": "<YourSubscriptionID>",
"resourceGroupName": "<YourResourceGroupWhereADLSResides>"
}
}
}

Dataset for the Raw JSON Data 

{
"name": "dsBankingADLSRawData",
"properties": {
"published": false,
"type": "AzureDataLakeStore",
"linkedServiceName": "lsBankingADLS",
"typeProperties": {
"fileName": "{year}/{month}/{day}.json",
"folderPath": "ATMMachineData/RawData/",
"format": {
"type": "JsonFormat"
},
"partitionedBy": [
{
"name": "year",
"value": {
"type": "DateTime",
"date": "SliceStart",
"format": "yyyy"
}
},
{
"name": "month",
"value": {
"type": "DateTime",
"date": "SliceStart",
"format": "MM"
}
},
{
"name": "day",
"value": {
"type": "DateTime",
"date": "SliceStart",
"format": "dd"
}
}
]
},
"availability": {
"frequency": "Day",
"interval": 1
},
"external": true,
"policy": {}
}
}

Dataset for the Standardized CSV Data

{
"name": "dsBankingADLSStandardizedData",
"properties": {
"published": false,
"type": "AzureDataLakeStore",
"linkedServiceName": "lsBankingADLS",
"typeProperties": {
"fileName": "SpecifiedInTheUSQLProcedure.csv",
"folderPath": "ATMMachineData/StandardizedData/{year}/{month}",
"format": {
"type": "TextFormat",
"columnDelimiter": ",",
"nullValue": "N/A",
"firstRowAsHeader": true
},
"partitionedBy": [
{
"name": "year",
"value": {
"type": "DateTime",
"date": "SliceStart",
"format": "yyyy"
}
},
{
"name": "month",
"value": {
"type": "DateTime",
"date": "SliceStart",
"format": "MM"
}
}
]
},
"availability": {
"frequency": "Day",
"interval": 1,
"anchorDateTime": "2017-03-14T00:00:00Z"
}
}
}

Pipeline with U-SQL Activity to Run the Procedure in ADLA 

{
"name": "plStandardizeBankingData",
"properties": {
"description": "Standardize JSON data into CSV, with friendly column names & consistent output for all event types. Creates one output (standardized) file per day.",
"activities": [
{
"type": "DataLakeAnalyticsU-SQL",
"typeProperties": {
"script": "BankingADLDB.dbo.uspCreateStandardizedDataset(System.DateTime.Parse(@DateSliceStart), System.DateTime.Parse(@DateSliceEnd));",
"degreeOfParallelism": 30,
"priority": 100,
"parameters": {
"DateSliceStart": "$$Text.Format('{0:yyyy-MM-ddTHH:mm:ssZ}', SliceStart)",
"DateSliceEnd": "$$Text.Format('{0:yyyy-MM-ddTHH:mm:ssZ}', SliceEnd)"
}
},
"inputs": [
{
"name": "dsBankingADLSRawData"
}
],
"outputs": [
{
"name": "dsBankingADLSStandardizedData"
}
],
"policy": {
"timeout": "06:00:00",
"concurrency": 10,
"executionPriorityOrder": "NewestFirst"
},
"scheduler": {
"frequency": "Day",
"interval": 1,
"anchorDateTime": "2017-03-14T00:00:00Z"
},
"name": "acStandardizeBankingData",
"linkedServiceName": "lsBankingADLA"
}
],
"start": "2017-03-14T00:00:00Z",
"end": "2017-03-15T00:00:00Z",
"isPaused": false,
"pipelineMode": "Scheduled"
}
}

A few comments about the pipeline:

ADFPipeline.jpg

Once all 5 components are deployed, they should look like this:

ADFObjects.jpg
 

Step 7: Verify Success of ADF Job

We can verify the ADF job succeeded by looking at the Monitor & Manage App (note you'll have to set the start time back to March 2017 for it to actually show any activity windows):

ADFM&MApp.jpg

We can also see in the ADLA Job Management area that an ADF job was executed (it very kindly prefixes jobs run by Data Factory with ADF):

ADLAJobManagement.jpg

Whew. That's it. This same technique will continue to work with various files across dates (though I kept it to just one input file to keep this already-super-duper-long-post as straightforward as possible).

Want to Know More?

My next all-day workshop on Architecting a Data Lake is in Raleigh, NC on April 13, 2018

You Might Also Like...

Querying Multi-Structured JSON Files with U-SQL

Handling Row Headers in U-SQL

Data Lake Use Cases and Planning Considerations